General Overview

- Settings
The place where you can configure your project, e.g. edit the name, connect a different e-commerce platform, update the logo, link a domain name, manage your subscription, etc. - Page
Navigation items without a dropdown icon are pages. Clicking on a page will display the fragments that are on that page. The home page is always displayed first and cannot be removed. - Template
Navigation items with a dropdown icon next to its name are templates. A template defines the layout of a page. You can assign multiple pages to the same template. When you change the template, all pages assigned to that template will be updated. - Add Page/Template
This button can be used to create a new page or template. - Save Project
Save your project. Saved changes will not reflect on the live site until you publish. - Publish Project
Publish your project. This will make your changes live on the site. - Content/Theme Toggle
Switch between the content and theme editor. The content editor is where you can drag and drop fragments into your project. The theme editor is where you can change the styling of your project. - Page Settings
The SEO settings of the current page. You can set the title, description, and image of the page. This page is extremely important if you want your site to be found by search engines. - Page Content
All fragments dropped on the current page are shown here. You can click on any of them to view more details or simply remove them from the page. - Fragment Library
All available fragments are shown here. You can drag and drop them into the content area to add them to your current page/template.
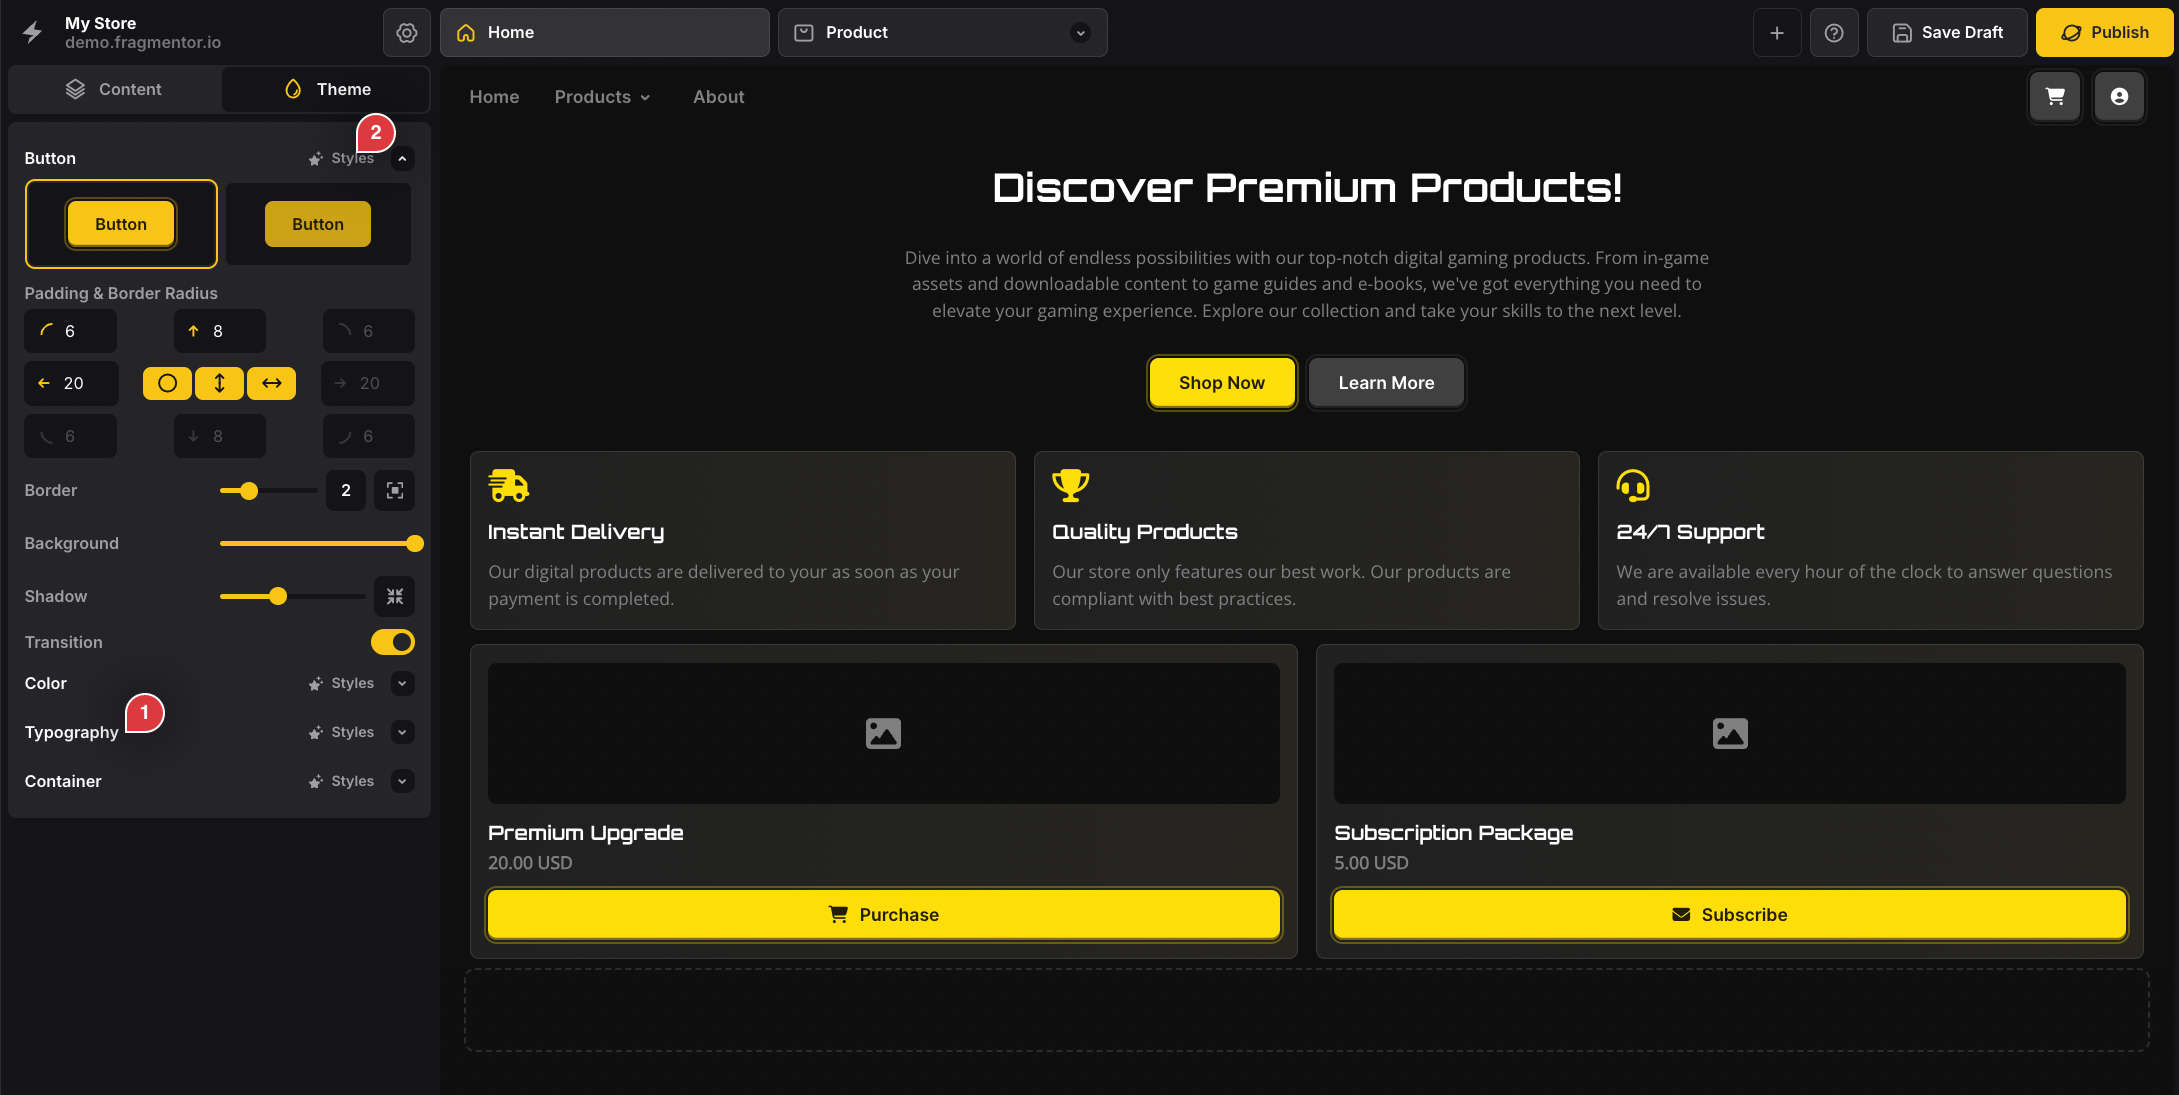
Theme Editor
The theme editor allows you to configure global styling options to your webstore. You can configure the buttons, colors, typography, and container layout/spacing.
- Theme Group
Theming options are grouped into different categories. Clicking on a group will display the options available in that group. - Styles
This button will trigger a popup with predefined styling options you can use. All are curated by us and are made to help you save time!
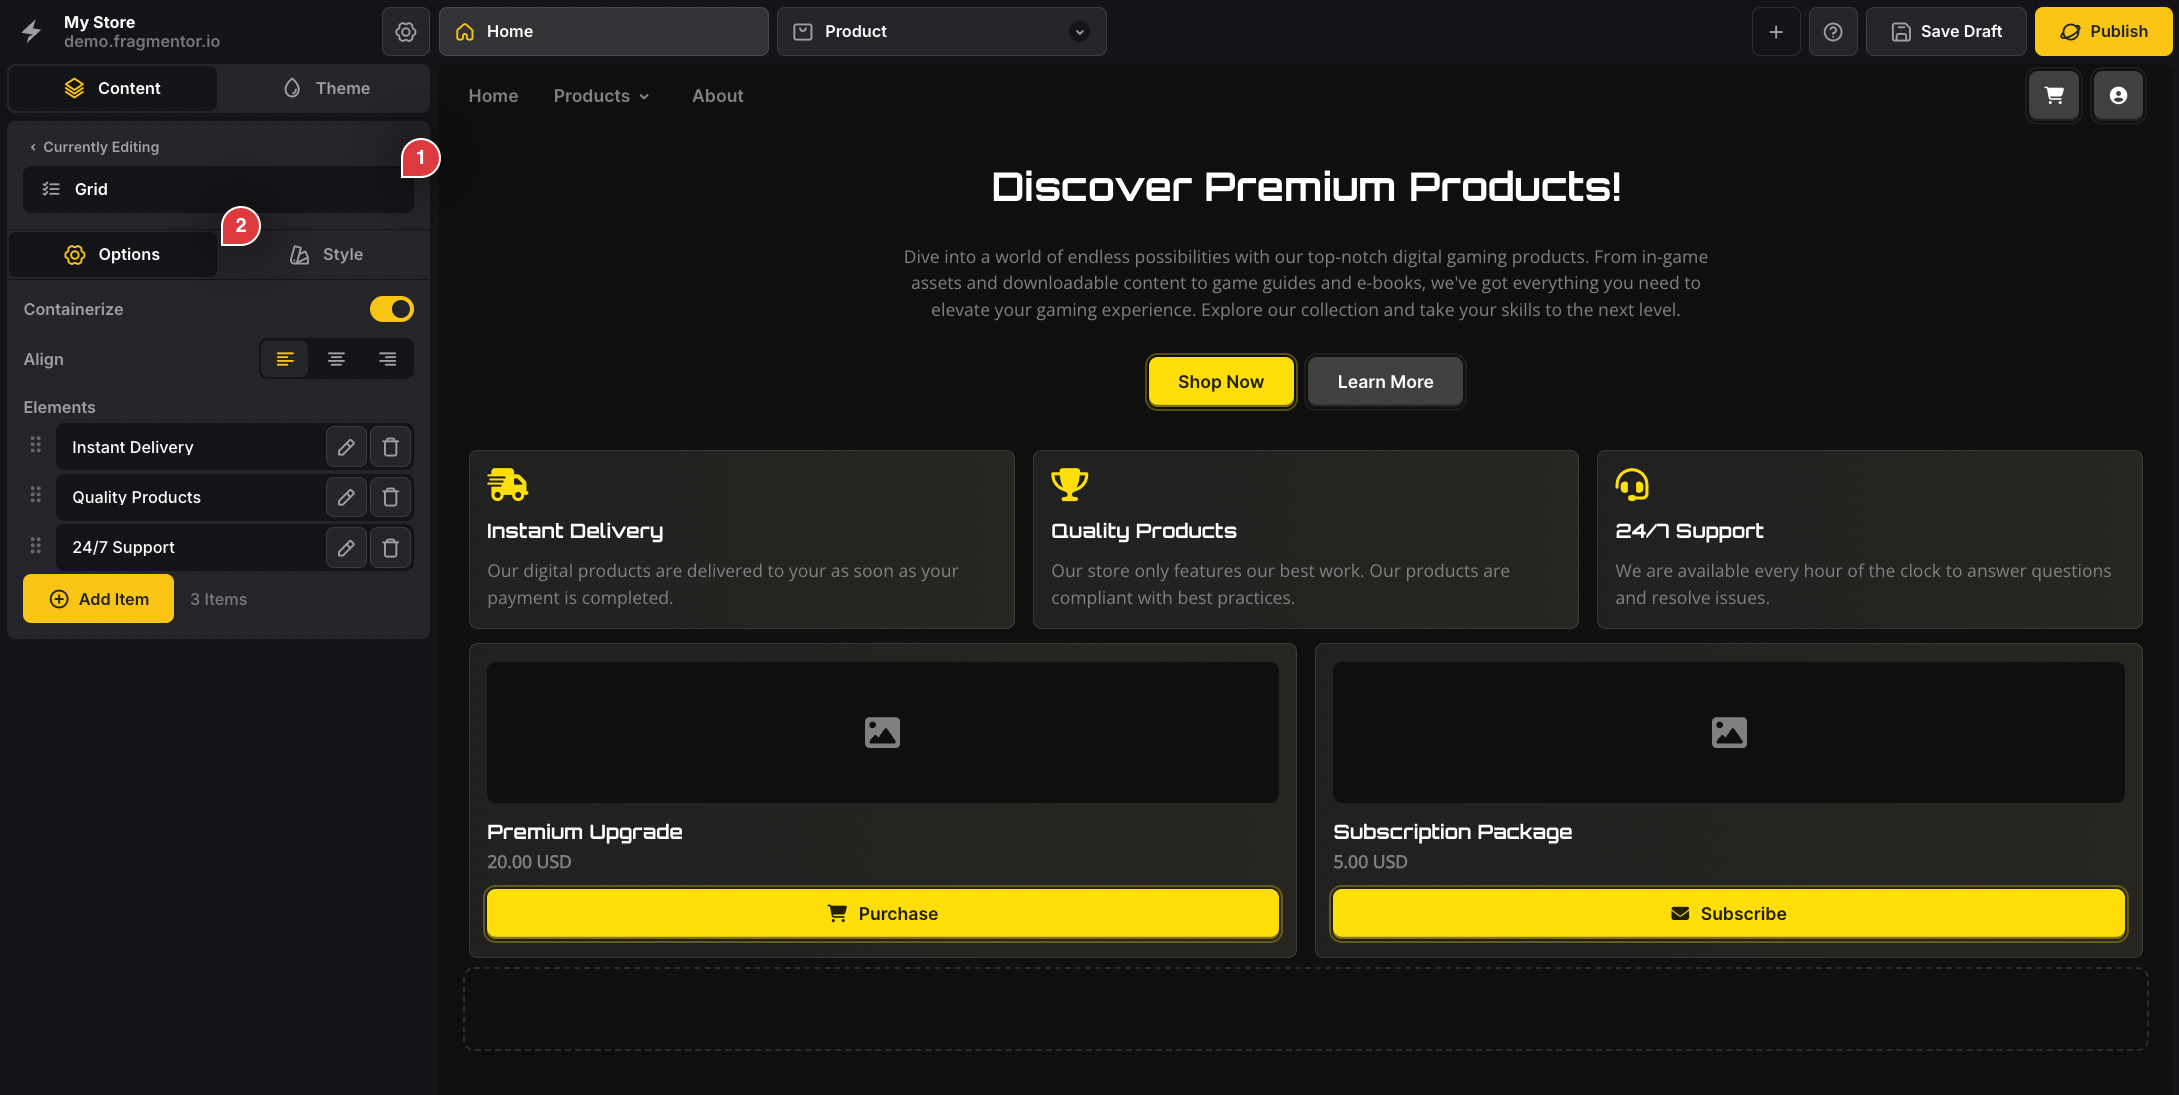
Content Editor
When clicking on any of the currently active fragments, you are prompted with configuration options. These options may be different for different fragment types. For example, a banner fragment has a title, description, and button text, while a FAQ fragment has a configurable list of questions and answers.
- Fragment Name
The name of the selected fragment. If you hover over this name, you’ll see two additional buttons show up, one to duplicate the fragment and one to remove it. - Fragment Settings
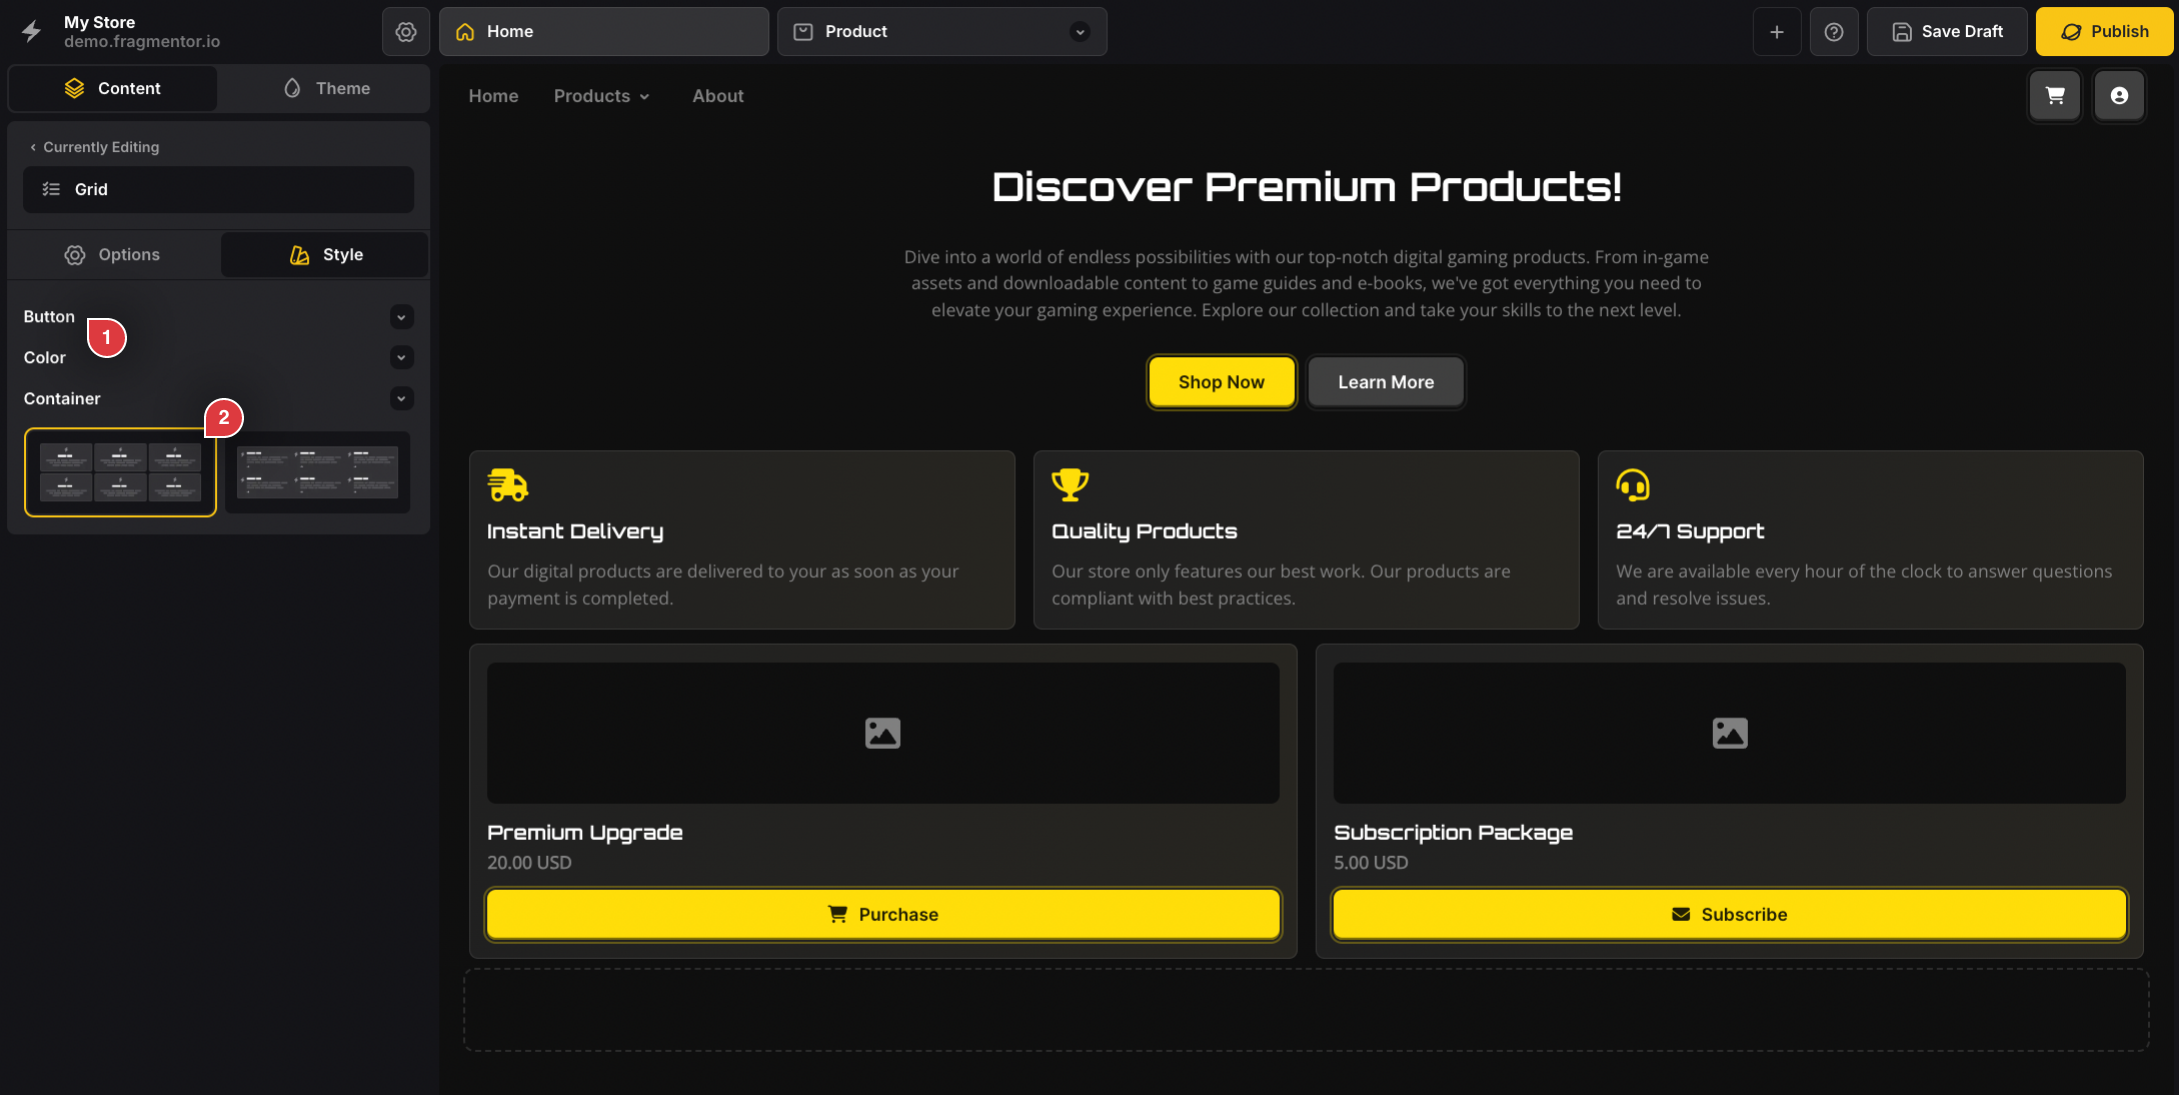
You can toggle between fragment options and fragment styling. In the options tab, you can configure the content of the fragment, while in the style tab you can configure the styling of the fragment.

- Fragment Theme Group
These style options will override the global theme settings for this specific fragment. This is useful if you want to have a different style for a specific fragment. - Fragment Variant
Each fragment has different variants or layouts.

